The format of photos taken by iPhone is “.heic” (High Efficiency Image File Format (Wikipedia)). It’s fine as long as I see them on Mac. But sometimes I need to covert it to JPEG (for blogging .etc)
How to convert it easily?
We can enhance Finder Quick Actions with Automator which is pre-installed on macOS.
You can download this workflow from my GitHub repo(ecpplus/shell-utils)
Convert it on command line
sips
By default, macOS has image processing cli named sips. It is located at /usr/bin/sips. There are bunch of options, but for now I only use format conversion.
Converting any image to jpeg command is below;
sips -s format jpeg $input_path --out $output_path
format output path
Output path should be foobar.jpg. On shellscript, we can easily format it from original path.
INPUT="/foo/bar/IMG_1234.heic"
echo ${INPUT%%.*}.jpg

=> /foo/bar/IMG_1234.jpg
support multiple images input
Now, I’d like to convert multiple images at once. We can use for loop like this;
for f in "$@"
do
  sips -s format jpeg "$f" --out "${f%%.*}".jpg
done
Make Automator workflow
-
Launch
Automator.appin Applications. -
Create a new workflow from
File(⌘N) -
Choose
Quick Action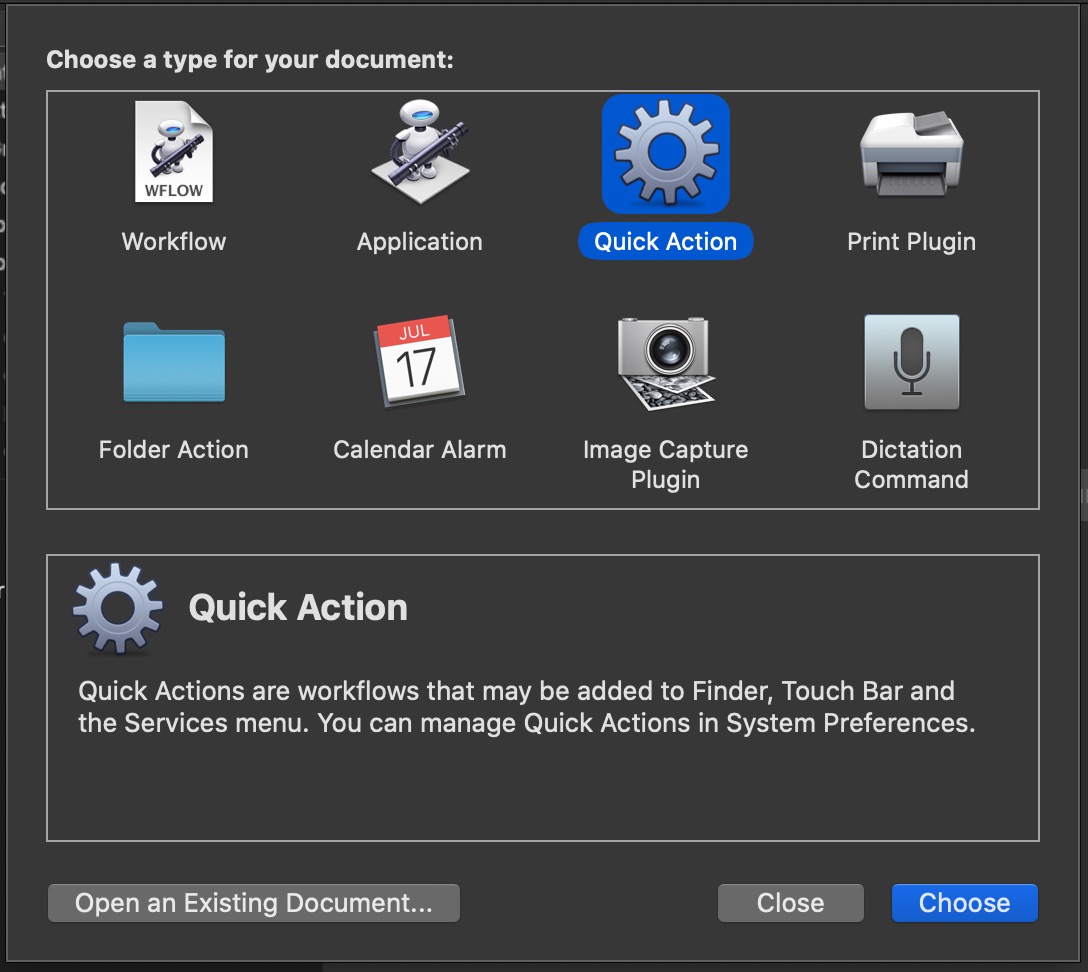
-
Define work flow as shown below
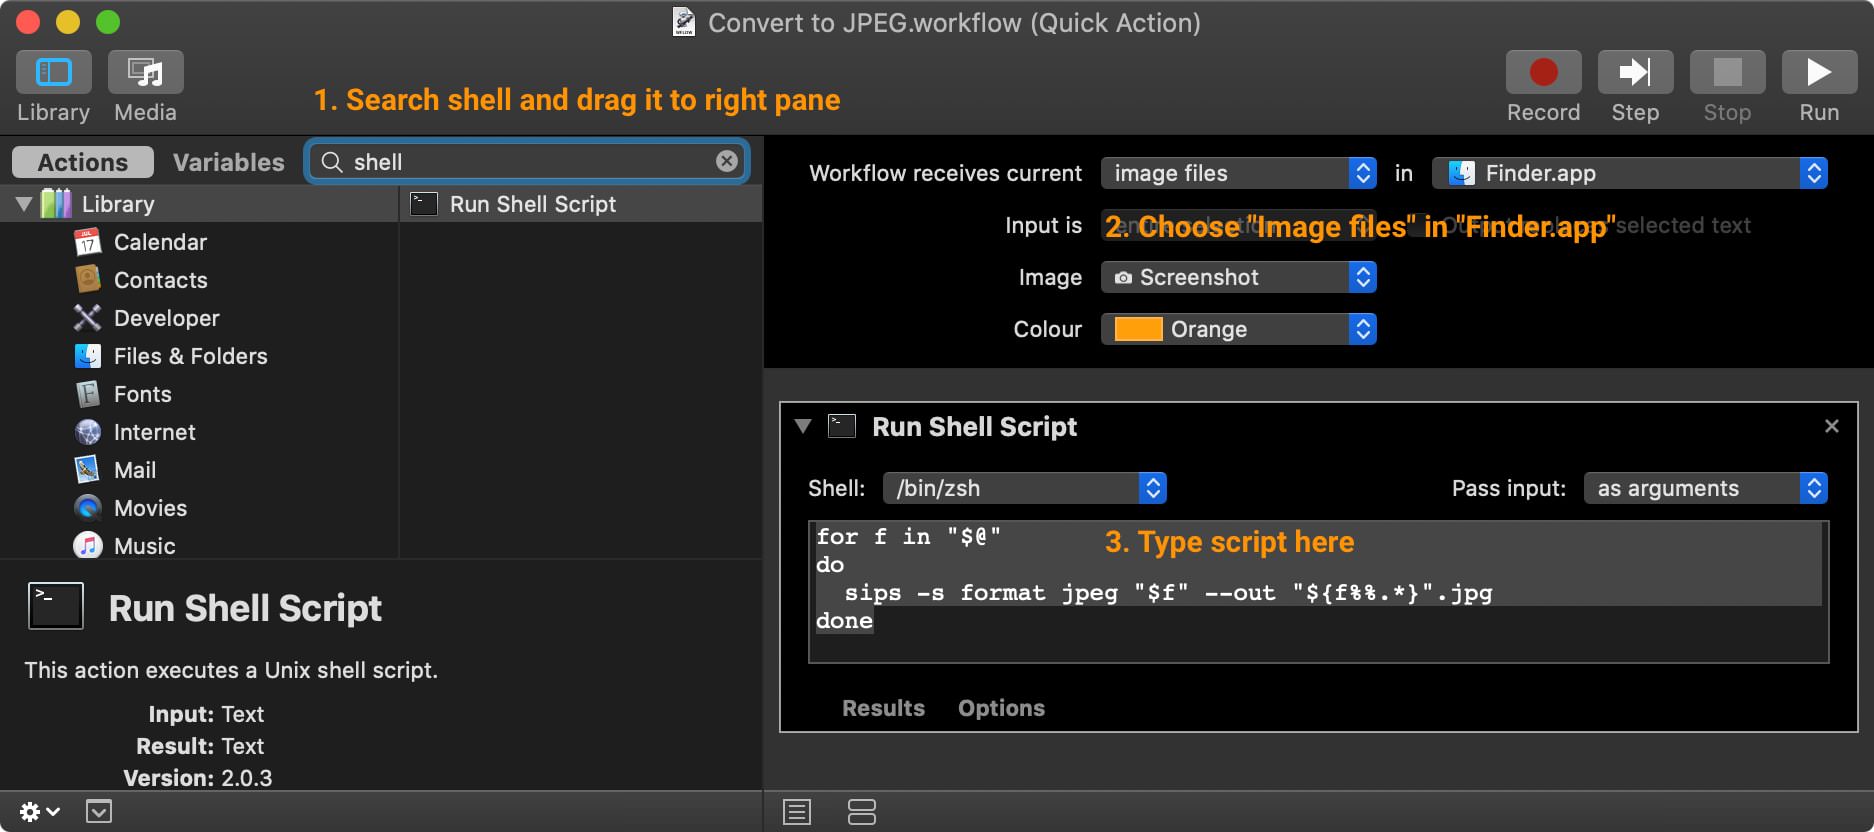
- Find
Run Shell Scriptfrom actions. - Workflow receives current
image filesinFinder.app - Type shell script.
for f in "$@" do sips -s format jpeg "$f" --out "${f%%.*}".jpg done - Find
-
Then save and name this workflow.
-
That’s it. You can now use it on Finder.
How to use it
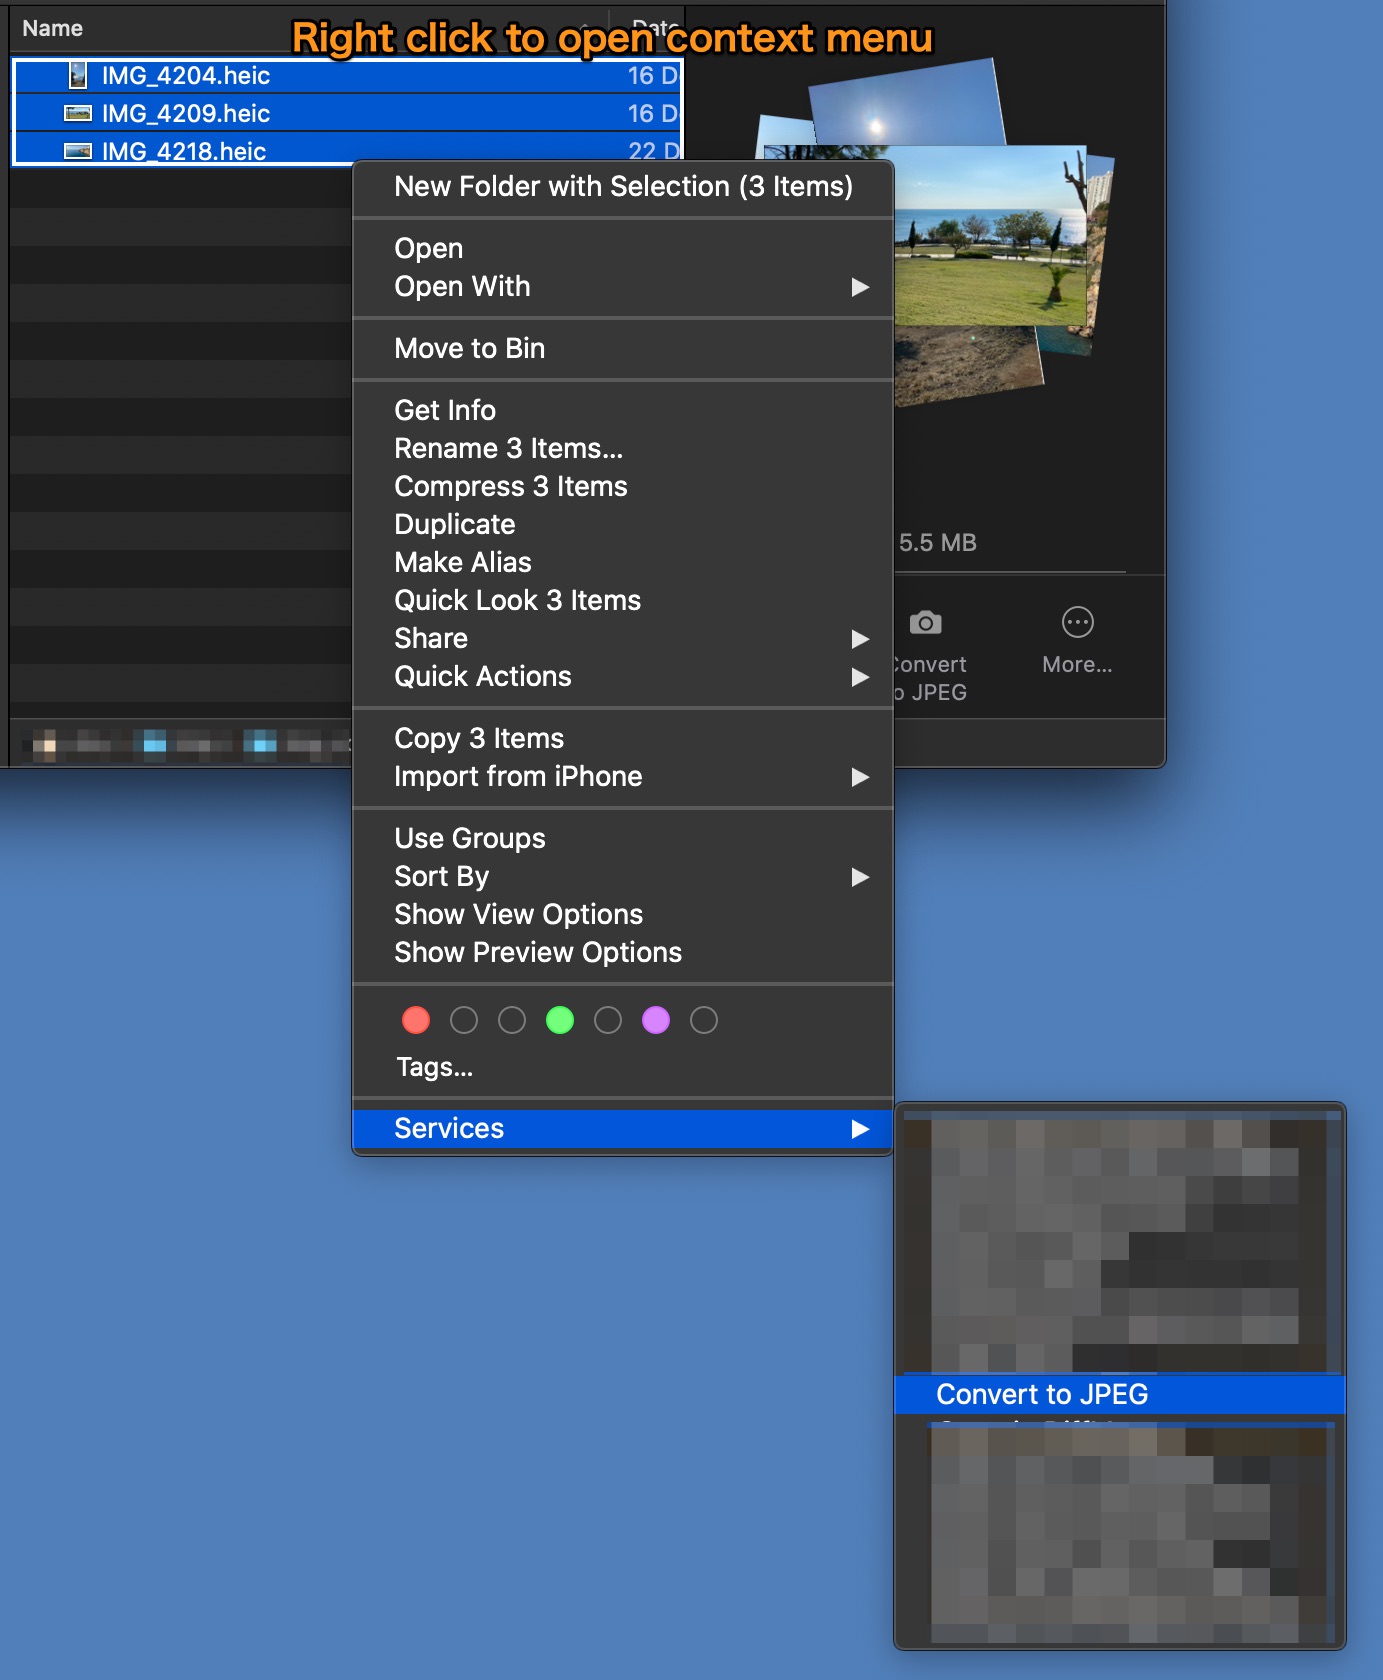
From context menu
- Choose single or multiple files on Finder, then right click.
- Choose
Service > Convert to JPEG(depends on your workflow’s name)
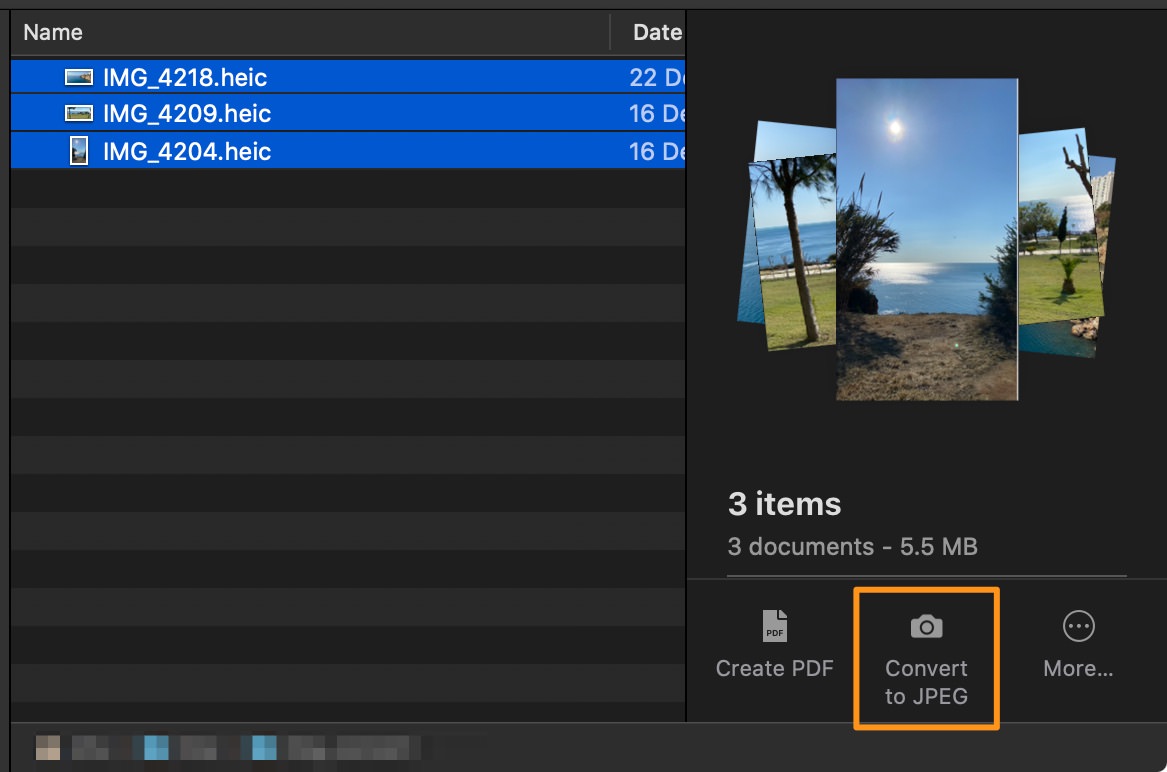
From preview area
- On my Mac, it’s automatically shown on my preview area. It’s easier.